H (Hand Tool) — When zoomed in to a portion of your photo, this command brings up the hand tool which allows for quick panning. Also, if the hand tool is active and you hold down the Ctrl key, you can zoom in without changing to the zoom tool. Likewise, if you hold down the Alt key, you can zoom out without changing tools.
Z (Zoom Tool) — This command just brings up the zoom tool, which allows you to zoom in. Like with the hand tool, if you hold down the Alt key, it temporarily switches to the zoom out mode.
Ctrl + 0 (Fit on Screen) — This is a quick-and-dirty command to get the entire photo in front of your eyes. That’s Ctrl + zero, not the letter “O”.
B (Brush Tool) — The brush is an extremely useful tool when working with masks, and I’m constantly using this command along with the hand and zoom tools.
Ctrl + Z (Undo) — Very useful for the little mistakes we all make.
Tab (Hide/Show Palettes) — Hiding the palettes gives you a little more working room, thus decreasing your need to pan and zoom while editing.
Intermediate Photoshop Shortcut Commands
[ (Decrease Brush Size) — Quickly decrease your brush size to get into those tighter spots.
] (Increase Brush Size) — Quickly increase your brush size for the larger areas.
Shift + [ (Decrease Brush Softness) — Decrease the softness of the brush by 25%.
Shift + ] (Increase Brush Softness) — Increase the softness of the brush by 25%.
1->0 (Tool Opacity) — Just press one of the numbers from 1 to 0 and your tool opacity will change from 10% up to 100%. If you want finer control, press a second number quickly after the first, and you can get any percentage you want. So pressing 4 will get you 40% opacity, while pressing 4 then 3 will give you 43% opacity.
Shift + 1->0 (Tool Flow) — This works exactly like the opacity changer, but you just have to hold the Shift key down while you hit the numbers.
Ctrl + Tab (Next Point on Curves Adjustment) — When using the curves adjustment dialog, you can place multiple points on the curve and adjust them accordingly. Sometimes you want to make very minor shifts in those points by nudging with the keyboard, but clicking on the point to activate it usually moves it to an undesired location. Use this command to switch focus from point to point without moving them around.
Advanced Photoshop Shortcut Commands
Ctrl + Shift + N (New Layer) — This will bring up the new layer dialog box and place a new layer on top of the active layer.
Ctrl + Alt + Shift + N (New Layer No Dialog) — This command skips the dialog box and just places a new layer on top of the active layer.
Ctrl + Shift + C (Copy Merged) — This works basically like the copy command, except you get a merged copy of the composite image sent to the clipboard. This command only works if you’ve made a selection on the image first (use Ctrl+A to select all), otherwise you’ll get a copy of nothing. This is useful if you want to duplicate what you see on the screen into another image file or even another layer.
Ctrl + Alt + Shift + E (Stamp Visible) — This is actually one of my favorite commands. First, I’ll create a new empty layer on top of the stack. Then I’ll select that new layer and use this command. It does basically the same thing as the copy merged command, except it places the copy right into the new layer. I use this for creating layer blends, sharpening, and any other type of editing that can’t be done non-destructively.
Ctrl + Alt + Shift + K (Show Keyboard Commands) — If you forget any of these commands, or if you want to check on other commands, use this to bring up the help dialog on keyboard shortcuts.
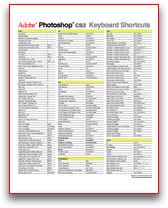
 Move faster in Photoshop using keyboard shortcuts. Download this handy PDF cheatsheet, print it out and keep it near your computer (you can choose between a Mac or Windows version):
Source: Created by Trevor Morris.


0 comments:
Post a Comment